Posts by
More than photography trips
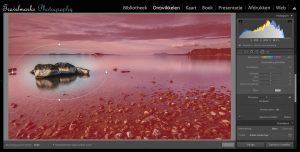
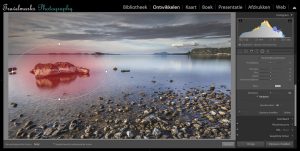 Using the 'mask' function in Lightroom, it becomes very easy to select a subject in your photo and then edit it. The program can even automatically recognize and select subjects quite accurately, which saves a lot of time in manual selection. In this item we give you some tips on how to use this feature and all its tools.

 Want to learn to photograph or gain experience?
Would you like to participate in one of the many workshops to learn more about your camera or image editing? Then sign up for one of our workshops. Would you rather join a multi-day photography trip? Then there is plenty of choice from our photo trips. It is also possible to order the ebook Lightroom Classic so you can get started yourself.
Till clicks!

Travel and photography enthusiasts know that proper preparation and planning is essential. There are countless apps that can help you with that, both during the preparations and during the trip. In this news item we give you a tip on a number of useful apps that should not be missed during your trip.
Camera app
If you have a camera that is compatible with an app, it can be downloaded for free. SnapBridge from Nikon or Camera Connect from Canon are examples of this. The app gives you the option of remote shooting, viewing and downloading photos directly.
Astro photography
There are a few factors to take into account when photographing the (starry) sky. First of all, the Golden Hour app is highly recommended so that you know exactly when twilight takes place. The Stellarium app helps you with an accurate overview of all the stars and planets. There is also an app for photographing the northern lights, which is called Aurora and lets you know exactly when and how big the chance is to see the northern lights. With the Light Pollution Map app you can check how much light pollution there is, so you know whether the phenomenon can be captured properly with the camera.
Weather conditions
One of the most important factors to consider when traveling and when shooting. By having different weather apps on your phone you can compare them with each other for an even more accurate weather forecast. The AccuWeather, Clear Outside and Weer Online app are quite accurate and therefore a good option.
Maps
The Google Maps app is already known to many, but the Maps.me app is a good alternative for offline use. You can also download different maps as long as you still have internet and use them when you no longer have access to WiFi. The Google Earth app is very useful if you want a more detailed map.
Government
The government also has some useful apps. The Reisapp contains a lot of important and useful information, for example about the safety of the country you want to go to and other travel advice. The CoronaCheck app is also one of them, on which you will find an overview of all your vaccinations.
Airlines
Are you traveling by plane and has the flight already been booked? With an app from the airline itself, you can often already check in online via the app, which saves time at the airport. In addition, you immediately have your boarding pass in the app and you cannot lose it. The Skyscanner app is a good option for comparing flights, so you can see at a glance what the options are.
Accommodations
Looking for a place to stay? There are also apps that offer endless possibilities for this. Booking.com is a well-known platform that compares different providers. Airbnb is a popular alternative, and you can often find more unique accommodations there. For those who prefer to stay in a hostel, the Hostelworld app is recommended. Would you rather go out with the camper and are you looking for a place to camp wild? Park4night is an app that shows you all these places.
Transport
Those looking for transport during their trip can use the Uber or Grab app to request a ride. When using public transport, apps such as Rome2rio, Omio and Moovit are very useful to plan your journey. These apps show you your route step by step and you will be immediately redirected to buy a ticket.
Relaxation
Some entertainment during the trip cannot be missed, especially during a long drive, flight or evening off. With apps such as Spotify and Netflix, it is possible to download music, films and series so that you can still enjoy them without internet. It is only possible if you have a subscription.
Inspiration and entertainment
Some apps for entertainment during the trip are Tripadvisor and GetYourGuide. Not only reviews can be found there, but also activities and tours. GetYourGuide is mainly aimed at attractions, museums, activities and tours that can be booked directly via the app. For more inspiration or sharing your own journey, Polarsteps is a well-known app. You can record your trip and route per day with photos or plan a trip with the help of other people's guides and tips.

Would you like to learn more about photography and your camera yourself? Or gain more experience during one of our photography trips? All Travelmarks workshops and trips are in small groups and accompanied by a professional photographer. For more information, take a look at the many workshops and photo trips and sign up.
Till clicks!
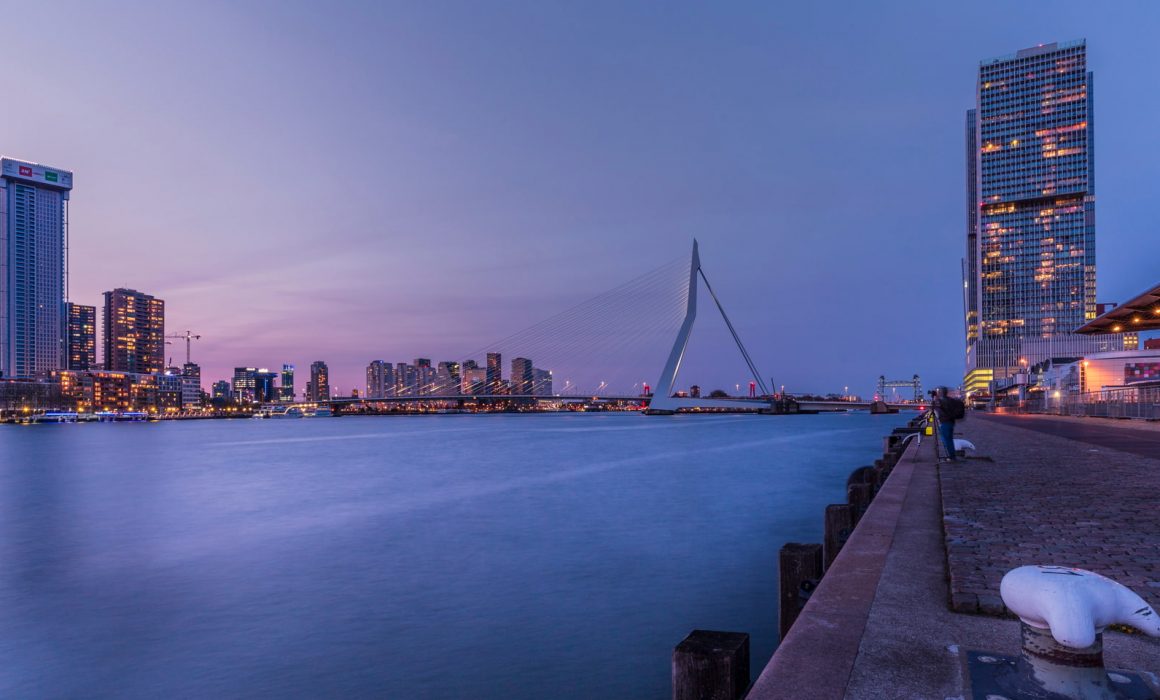
Rotterdam, the port city of the Netherlands and also the largest in Europe. Not only one of the largest and most important cities in the Netherlands, but also a city with a lot of history and diversity. Because the historic center was largely destroyed during the bombardment in 1940, the city was rebuilt, so that the city is now a mix of historic districts and modern architecture. This makes Rotterdam a playground for photographers who love architecture and street photography.
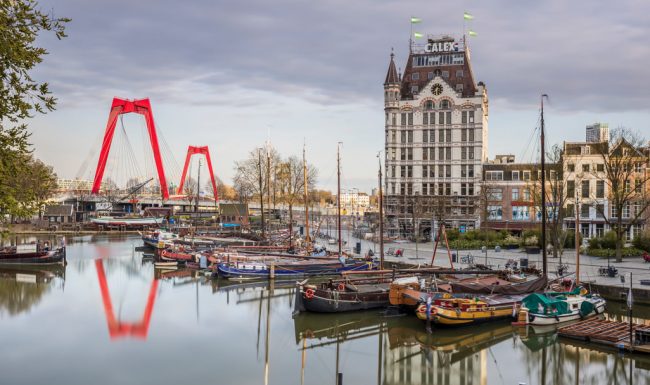 The Delfshaven in Rotterdam is a picturesque marina, which can still be admired in its original state. The characteristic mansions make it seem as if you are in Amsterdam.
Would you like to participate in the photography day in Rotterdam during the World Port Days? Then take a look at photography day Rotterdam and sign up! Or choose one of our other workshops.
More interested in a multi-day photography trip? Then there is bound to be something nice for you at the photography weekends- and trips.
Till clicks!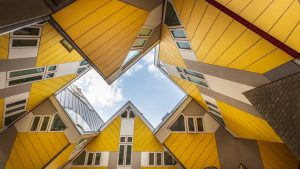

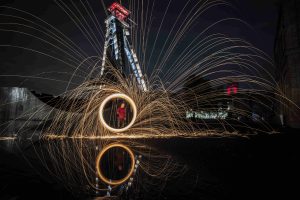
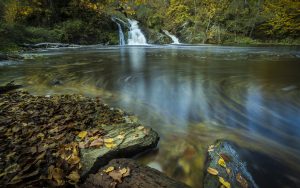
For those who want to photograph with long shutter speeds, different types of filters will quickly come into consideration. In this item we give you some useful tips for shooting with a slow shutter speed and using filters. This way you can get started yourself!
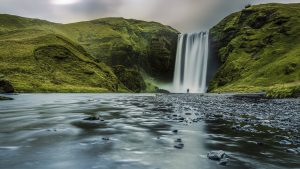 Capturing water and air
When do you use a slow shutter speed? For example, when capturing a certain movement, such as water and air. Think of a smoothly ironed lake or sea, or even a waterfall. The sky also makes for beautiful pictures, the movement of the clouds is captured by the long shutter speed. This effect makes the clouds appear long and stretched out, sometimes even more dramatic.
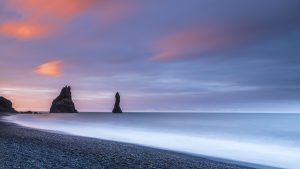 Does your composition have a straight horizon? Then it is best to use a hard filter. For example, if you have a mountainous landscape, a soft filter is recommended. A soft filter has a soft gradient and thus gradually changes in density, while a hard filter has a tighter transition.
 Want to learn to photograph or gain experience?
Shooting with slow shutter speeds and using filters is discussed in various workshops of Travelmarks-Photography. Would you like to participate in it? Then take a look at the many workshops. For the travel lovers there are also some cool photo trips where you can improve your photography skills. If you are interested, sign up quickly and till clicks!
Just across the border in Belgium you will find the C-mine, a beautiful mine perfect for industrial photography. Recently another workshop took place at this unique location. The day was optimally used, both outside and inside the mines were photographed during the blue hour and some spectacular lightpaint demonstrations were given. In these customer stories, Natascha tells about her experience of the workshop.

The workshop C-mine in Genk, Belgium is the first workshop of Travelmarks-Photography in which Natascha has participated. In addition to her work, she has her own photo studio at home where she also regularly photographs. In her field of work as a photographer, she describes herself as very broad because she finds many types of photography interesting and fun to capture, such as fine art, urbex and portraits. In the future, she hopes to turn her passion into her full-time job.
Why did you choose to participate in this workshop?
A friend of mine had selected the workshop, so I went along. The location of the workshop is also a bit urbex-like, so I thought it would be fun to shoot there.
What did you do during the workshop?
We were on location around 11 am until about 8 pm. We have photographed both inside and outside. Even in the evening when it got dark. During the workshop we learned a lot about camera settings, which angles are good to shoot from and how you can create reflections with water. We were also able to take pictures of Mark's lightpaint demonstrations. In doing so, we learned to use the correct camera settings. The C-mine is a great terrain, both the mines and the tunnels were very cool. The stories about the mines and the history behind them were also very impressive. And we were very lucky with the weather. The crowds were also not too bad, which made it easy for us to take pictures. Finally, we all had dinner together to end the day.

Was it as you expected?
I have done workshops before and of course everyone does it differently. But I am very satisfied with the C-mine workshop. There was a nice and relaxed atmosphere. Good instructions were given by Mark and I was able to take a lot of pictures that day. In the whatsapp group with all participants, some have shared their photos. It's nice to see how everyone has their own way of post-processing. Even if everyone took the same photo, the end result can be very different.
How did you find the guidance and would you recommend the workshop to others?
Totally great. Mark was very friendly and open, and you could never ask too many questions. There was enough time for questions and guidance. So a very nice person to follow a workshop with. You notice that he is knowledgeable, takes his time and is calm. But there was definitely a bit of humor too, so highly recommended. I am also certainly open to participating in a photography workshop or trip again.
Just as excited to participate in one of many workshops? Or even a multi day photography trip? Then take a look for more information and sign up!
Till clicks!

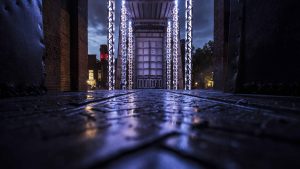
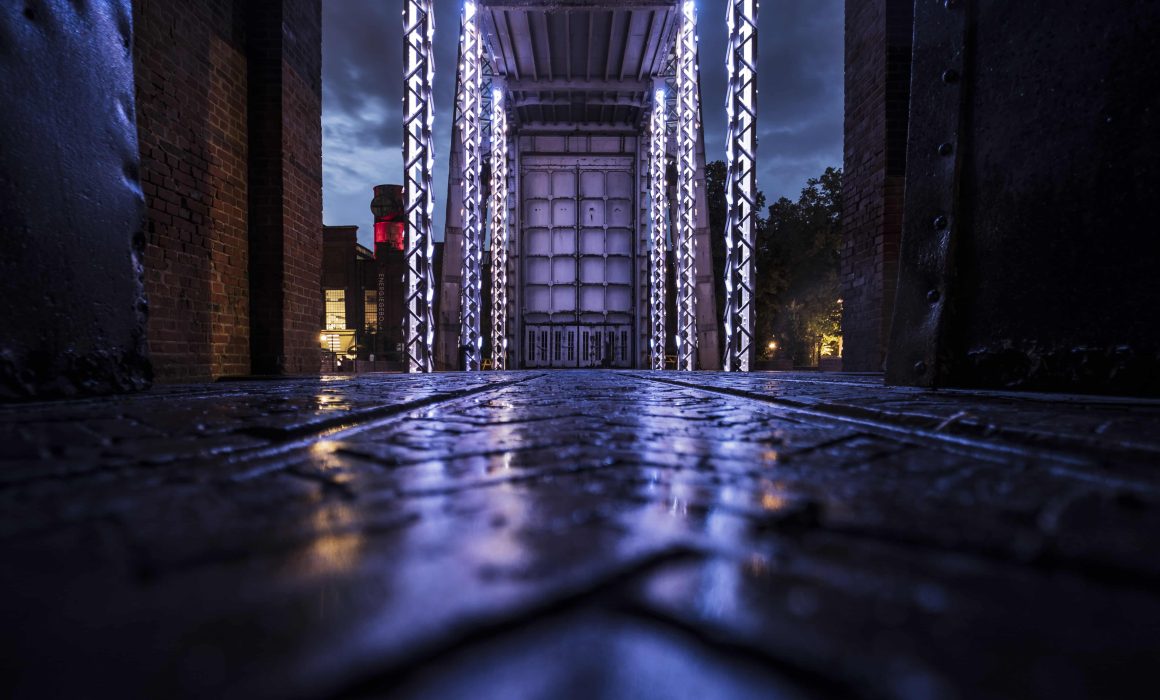
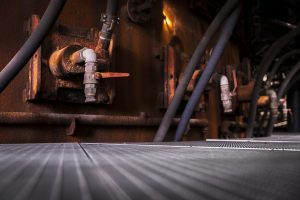
Photography has many niches, one of which is industrial photography. You take photos at locations such as companies, factories and industrial sites. It is a somewhat rougher form of photography and can sometimes be compared to urbex photography, because some locations seem quite remote and deserted. In this article we give you a number of tips that you can take into account for industrial photography. The inspiration for this news item and the photos come from the C-mine in Genk, Belgium.
Would you like to try out industrial photography yourself? Then take a look at the many workshops. During the workshops you can gain experience at your own pace, under the guidance of a professional photographer. Because the workshops are in small groups, there is enough time and attention for each student. Would you like to participate? Then sign up right away!
Till clicks!


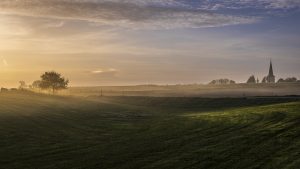
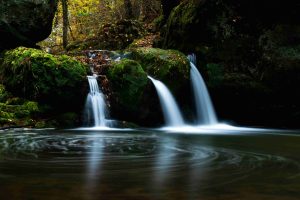
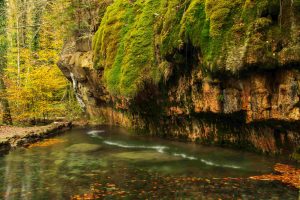
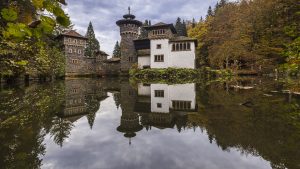
The 4-day photography trip to Luxembourg has recently taken place again. A trip close to home but it still has a lot to offer. Including the old city center where remnants of the fortress walls can still be seen. The city center even belongs to the UNESCO World Heritage List. But there is also plenty to visit outside the city. Luxembourg city is surrounded by beautiful nature, full of hiking trails and castles. Which makes it an ideal destination for photography.
Do you want to know more about the diversity of Luxembourg? Then take a look at our other newsitem.
Last October, Travelmarks and a group of students spent a few days in the versatile and green Luxembourg. Including student Arijan van Alphen, who has had a passion for nature and sports photography for a long time. It was the first time for him to participate in a photography trip and workshop. In this news item, Arijan tells about his experience of the photography trip to Luxembourg.
Why did you choose to join the Luxembourg trip?
I had been looking for a photography workshop for some time to improve my photography skills, but many workshops are often only half a day and a large group. The advantage of the trip to Luxembourg was the small group and the pricing. When I came across this photo tour on Facebook, it caught my eye. The promise of a small group of students with an appealing, versatile program appealed to me, which is why I decided to sign up.
What did you do during the 4-day trip?
I've tried many things to take different types of photos, for example playing with depth of field. The waterfalls at Schiessentümpel and Kallektuffquell that we visited were nice, because I prefer to have something of water in nature photography. The evening/night photography in Esch-sur-Sûre and Vianden were another branch of photography for me that also gave me inspiration. We couldn't have been more fortunate in terms of weather conditions.
The photos below were taken by Arijan during the photo tour.
How was the guidance and do you have any tips for the next workshop?
As expected actually, excellent guidance before and during the trip. In addition to the planned activities, there was also room for improvisation, which we eagerly used as a group. During the trip, Mark had the necessary tips and tricks for every student at his/her level and, not to forget, sufficient attention, not only in terms of photography, but also for the person. The time schedule was determined so that everyone on location could go wild with photography. In a few weeks we will meet again with the group to share our photos, among other things.
A tip for a next photography tour or workshop would be a general explanation upon arrival at a location, before everyone starts shooting. For example, by sharing some tips and explanations about the correct camera settings, so that we can get started right away.
Would you recommend this trip to others?
It is definitely recommended for others. It is freely accessible and short. In addition, it is suitable for all levels. I will even participate in another photography workshop at Travelmarks soon.
Would you also like to participate in a photography tour or workshop yourself? Then take a look at the many workshops or at the multi-day photo trips and tours, and sign up!
Till clicks!

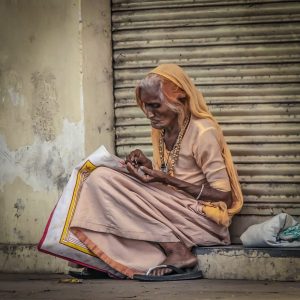
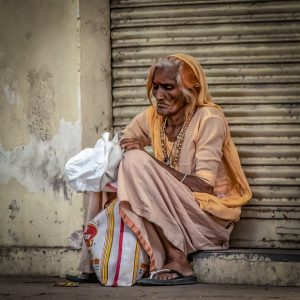
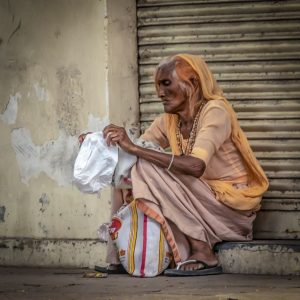
For those who take the camera with them on a trip, they have to deal with someone else's culture and the associated norms and values. With cultural photography you will therefore notice that a lot can be achieved with mutual respect. To help you on your way to achieving this, we'll give you a number of tips and examples.
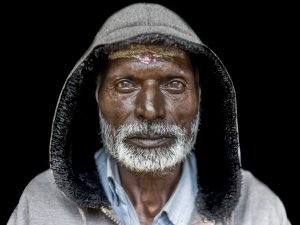
Preparation is essential on any trip. And by that, we don't mean looking up nice sights or holidays, but delving into the culture and faith there, such as their norms and values, but also their customs. For example, when photographing the Masai, it is customary to dance and sing to someone to thank them. This may seem a bit uncomfortable at first glance, but it is actually a form of gratitude. There are also some cultures that believe that a piece of their soul is taken from them the moment they are photographed. Then it is often wise to ask permission in advance. Such handy do's and don'ts can already be found online, so make sure to use them.
Cultural photography is mainly about the interactions between the photographer and the subject. Earning the respect is therefore more important than the result. That is also the added value of this type of photography, where you mainly make personal images. Often people have a certain pride at the moment you show them their photo, something that is not at all self-evident for many in certain places. These kind of beautiful moments that you share with each other often make the best memories. We are therefore happy to give you a number of tips if you want to get started yourself;
Would you like to learn more about photography and your camera yourself? Or gain more experience during one of our photography trips? All Travelmarks workshops and trips are in small groups and accompanied by a professional photographer. For more information, take a look at the many workshops and photo trips and sign up.
Till clicks!
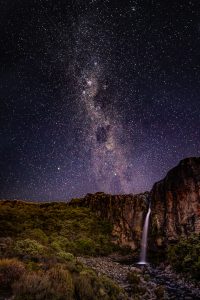
Photographing the starry sky is also known as astrophotography. For example photographing stars and planets when it is dark. It is a certain niche within the photography world that requires a lot of time and precision. In this news item, customer Tom tells about his experience of the astrophotography workshop and we will give you a number of tips to get started with capturing the starry sky.
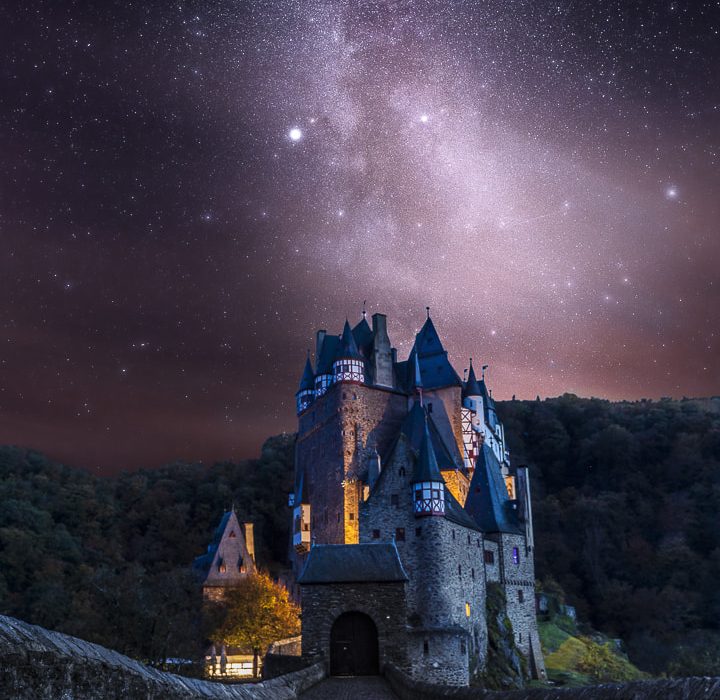
Hobby photographer Tom recently took part in the astrophotography workshop at Travelmarks. This workshop took place at Eltz Castle in Germany. A photogenic location with beautiful natural surroundings. For this news item we asked him to share his experience with us.
Why did you choose to participate in this workshop?
I am interested in astrophotography and capturing it. Normally, I mainly photograph nature and landscape, but I prefer to be all-round. When I came across this workshop, I signed up to learn more about the startracker, which is needed when photographing the starry sky. This was also my first time doing a workshop like this.
What did you do during the workshop?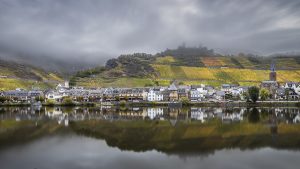
In the morning we took pictures at the river, It was still foggy and you could see another castle in the distance at the top of the mountain, which makes for a nice picture. During our visit we also went inside, where they walked around in traditional costumes. There was even a blacksmith at work and a singer, making it quite an experience. In the evening after dinner, we photographed the Milky Way at Burg Eltz until it was no longer visible. We used a startracker for this. That was very interesting and I learned a lot about it.
Was it as you expected?
More or less, we managed to photograph the Milky Way. We were dependent on the weather, because we already had to reschedule the workshop twice due to the weather conditions. But it was certainly a successful workshop and worth repeating. Perhaps in a different environment.
Are you satisfied with the results?
Yes, the result has become beautiful, but the photos still need to be edited. A few weeks later, we had also sat down with the group and Mark to share each other's work. There were plenty nice photos and everyone was very satisfied.
How was the guidance and do you have any tips for the next workshop?
The guidance was good, we also got a lot of time to get started ourselves. I also received some positive feedback. And the other students were actually just as enthusiastic. For a next time, an overnight stay could be added, so that there is even more time for astrophotography. The first evening we became acquainted with the startracker and the next evening we could start shooting. It would have been nice to have had more time for that.
Would you recommend this workshop for others?
In case you are interested, or if you want to delve further into it, then yes. There was good guidance so it is also doable for beginners. You do need some knowledge about the device. The starttracker is not yet known to many, but that was also explained.
What was the highlight for you?
It would be the evening at the castle / fortress Eltz for me, with photographing the Milky Way and the beautiful green surroundings there.

Want to get started yourself? Then we are happy to give you some tips to help you on your way!
Would you like to learn more about (astro)photography and your camera yourself? Or gain more experience in the outdoors with guidance? Then take a look at the many workshops and sign up.
Till clicks!

![]()
Recente reacties