Category

More than photography trips
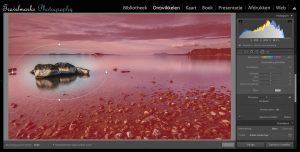
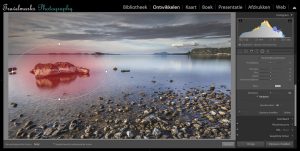 Using the 'mask' function in Lightroom, it becomes very easy to select a subject in your photo and then edit it. The program can even automatically recognize and select subjects quite accurately, which saves a lot of time in manual selection. In this item we give you some tips on how to use this feature and all its tools.

 Want to learn to photograph or gain experience?
Would you like to participate in one of the many workshops to learn more about your camera or image editing? Then sign up for one of our workshops. Would you rather join a multi-day photography trip? Then there is plenty of choice from our photo trips. It is also possible to order the ebook Lightroom Classic so you can get started yourself.
Till clicks!

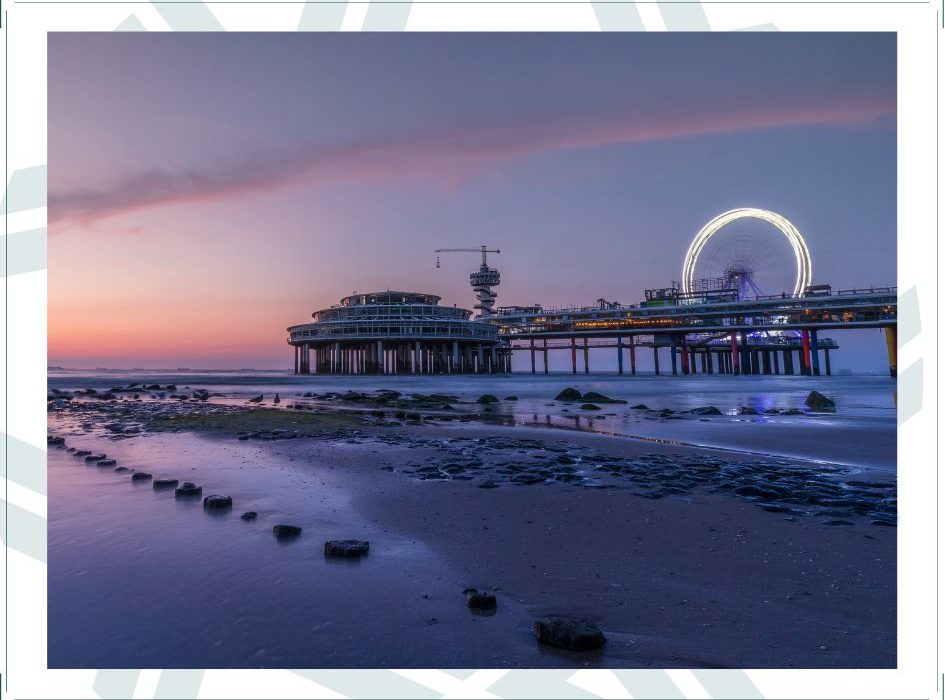
For those who want to photograph with long shutter speeds, different types of filters will quickly come into consideration. In this item we give you some useful tips for shooting with a slow shutter speed and using filters. This way you can get started yourself!
 Capturing water and air
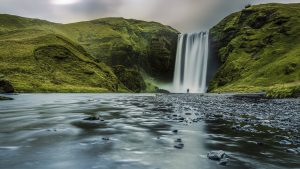
When do you use a slow shutter speed? For example, when capturing a certain movement, such as water and air. Think of a smoothly ironed lake or sea, or even a waterfall. The sky also makes for beautiful pictures, the movement of the clouds is captured by the long shutter speed. This effect makes the clouds appear long and stretched out, sometimes even more dramatic.
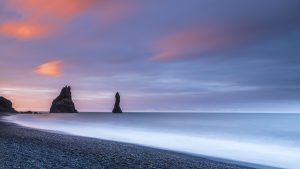 Does your composition have a straight horizon? Then it is best to use a hard filter. For example, if you have a mountainous landscape, a soft filter is recommended. A soft filter has a soft gradient and thus gradually changes in density, while a hard filter has a tighter transition.
 Want to learn to photograph or gain experience?
Shooting with slow shutter speeds and using filters is discussed in various workshops of Travelmarks-Photography. Would you like to participate in it? Then take a look at the many workshops. For the travel lovers there are also some cool photo trips where you can improve your photography skills. If you are interested, sign up quickly and till clicks!

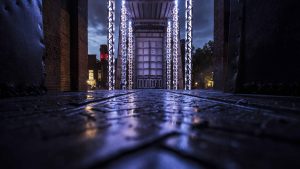
Photography has many niches, one of which is industrial photography. You take photos at locations such as companies, factories and industrial sites. It is a somewhat rougher form of photography and can sometimes be compared to urbex photography, because some locations seem quite remote and deserted. In this article we give you a number of tips that you can take into account for industrial photography. The inspiration for this news item and the photos come from the C-mine in Genk, Belgium.

Would you like to try out industrial photography yourself? Then take a look at the many workshops. During the workshops you can gain experience at your own pace, under the guidance of a professional photographer. Because the workshops are in small groups, there is enough time and attention for each student. Would you like to participate? Then sign up right away!
Till clicks!


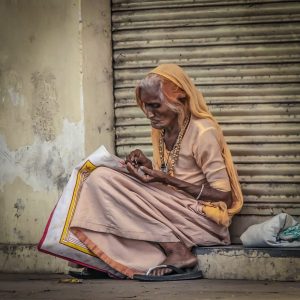
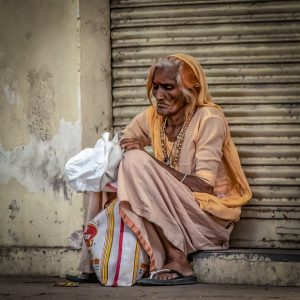
For those who take the camera with them on a trip, they have to deal with someone else's culture and the associated norms and values. With cultural photography you will therefore notice that a lot can be achieved with mutual respect. To help you on your way to achieving this, we'll give you a number of tips and examples.
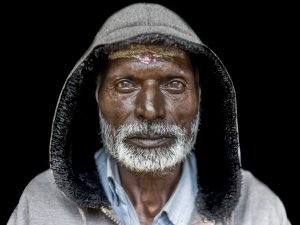
Preparation is essential on any trip. And by that, we don't mean looking up nice sights or holidays, but delving into the culture and faith there, such as their norms and values, but also their customs. For example, when photographing the Masai, it is customary to dance and sing to someone to thank them. This may seem a bit uncomfortable at first glance, but it is actually a form of gratitude. There are also some cultures that believe that a piece of their soul is taken from them the moment they are photographed. Then it is often wise to ask permission in advance. Such handy do's and don'ts can already be found online, so make sure to use them.
Cultural photography is mainly about the interactions between the photographer and the subject. Earning the respect is therefore more important than the result. That is also the added value of this type of photography, where you mainly make personal images. Often people have a certain pride at the moment you show them their photo, something that is not at all self-evident for many in certain places. These kind of beautiful moments that you share with each other often make the best memories. We are therefore happy to give you a number of tips if you want to get started yourself;

Would you like to learn more about photography and your camera yourself? Or gain more experience during one of our photography trips? All Travelmarks workshops and trips are in small groups and accompanied by a professional photographer. For more information, take a look at the many workshops and photo trips and sign up.
Till clicks!
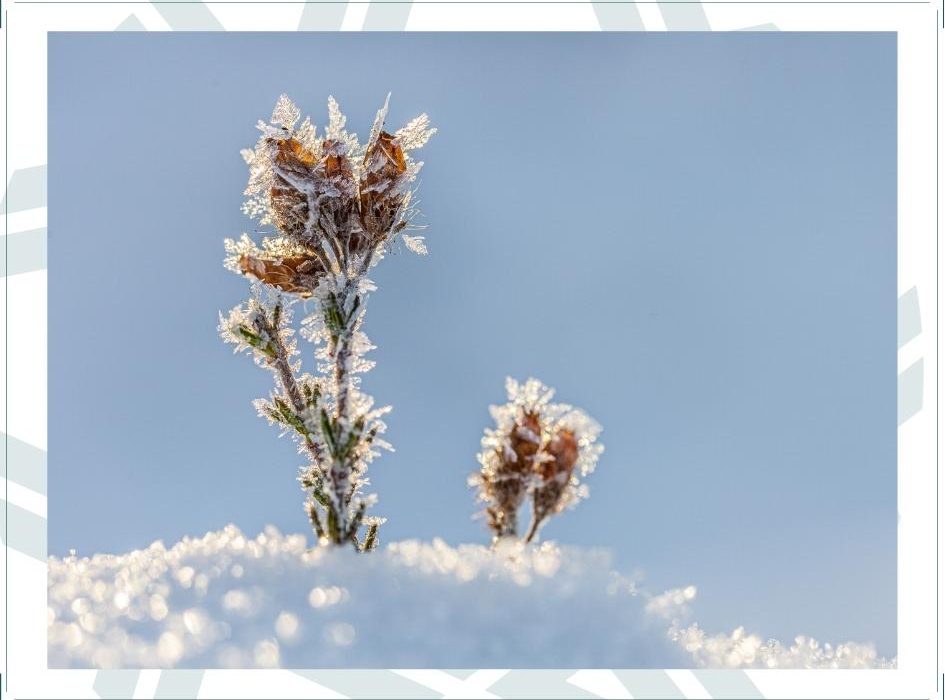
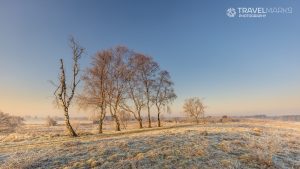
The winter period is a great season to photograph. Now that winter time is approaching, we have listed a number of tips. So that you are well prepared and can shoot such beautiful winter pictures yourself.
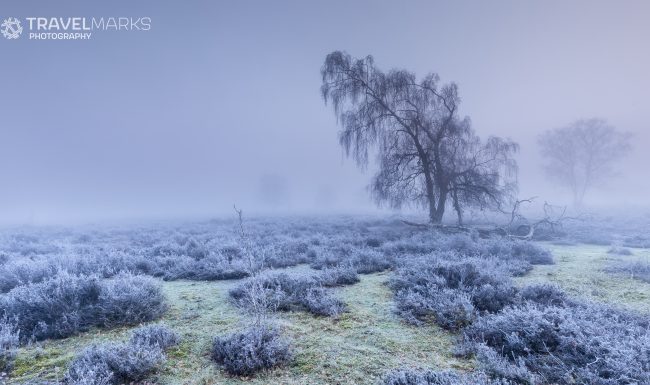
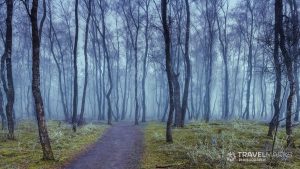 When photographing a winter landscape, good planning is very important. The best time for this is in the morning, around sunrise. Fortunately, the sun rises a little later in winter, so you don't have to get out of bed too early. It is important to be on location on time so that you can prepare everything properly and make optimal use of the so-called blue and golden hour. The blue hour is just before the golden hour in the morning, in the evening it is just the other way around. During the blue hour, the sky begins to take on more color as it transitions from night to day. At the beginning of that hour, at 'civil twilight', there is often still some fog, which even creates a fairytale atmosphere. The golden hour begins shortly after the blue hour.
If you want to capture the many ice crystals, you have to be there in time. They are best visible at sunrise, when it has frozen at night. It is coldest when the sun rises. Soon after, everything is slowly warmed up by the sun, and the ice crystals will disappear.
 Choosing the composition
In addition to the right timing, choosing the location and composition is also important. It's good to know exactly where the sun rises and how you want to take your picture. During the sunrise you can shoot towards the sun for a colorful sky. When the sun is a bit higher, you can change position and photograph with the sun at your back. That way you get the soft and warm glow of the light in the photo.

Now that you know where and when to shoot, it's time for how to do it. For landscape photography, a large depth of field is recommended. That is, for example, an aperture between F11 and F16. For lovers of nature and macro photography, a low aperture is used. This is between F2.8 and F5.6, so you get your subject sharp and the background a bit blurry, so that more depth is created.
Would you like to learn more about photography and your camera yourself? Or gain more experience in the outdoors with guidance? Then take a look at the many workshops and sign up.
Till clicks!

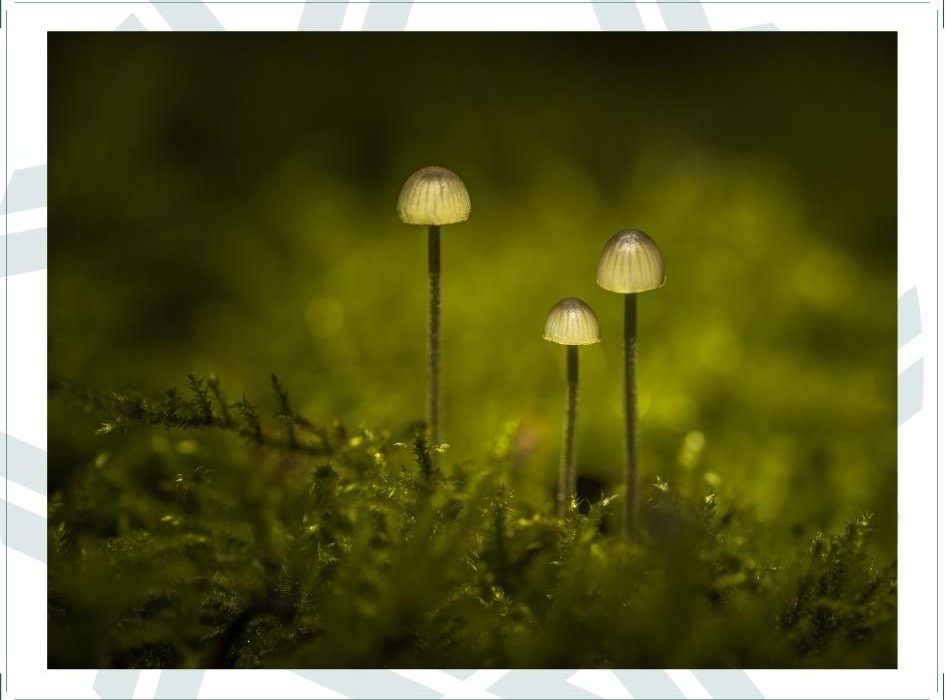
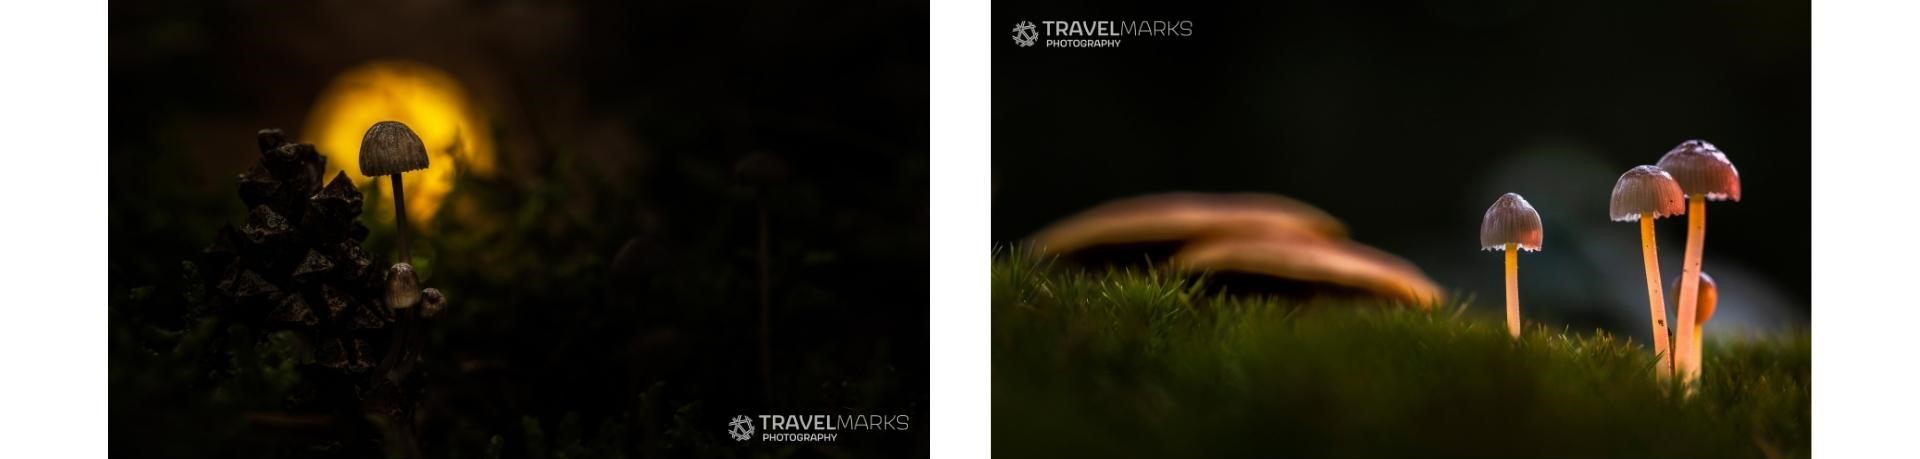
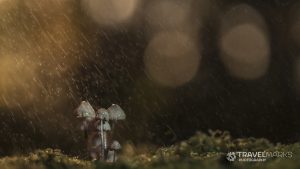
It's that time of year again when mushrooms shoot out of the ground en masse. There are thousands of species to be found in the Netherlands. So a good reason to go out and capture them. To help you on your way, we will give you a few tips for taking a beautiful and creative photo.
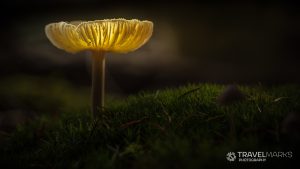
Summer is over and it's raining more and more. Ideal for the mushrooms, because they appear fairly quickly after a wet period. Those who want to shoot a typical autumn picture in the forest can of course not forget the mushrooms. It is almost a challenge to look for the most beautiful and unique mushrooms, because they often hide among the grass or grow on the trees.
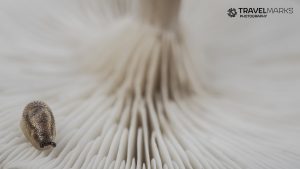
Mushrooms are perfect for macro photography. Each mushroom has its own structure, color or shape and those details can be captured very well with a macro lens. Not only the top of the mushroom, but also the gills underneath the cap make for very nice pictures. When taking such detailed photos, also take into account disturbing elements, such as sand, twigs and damage to the mushroom.

Want to learn more about macro photography? Take a look at our workshops and sign up!
During the workshops you will put what you have learned into practice in small groups. There is guidance where necessary and enough time and space for taking pictures, which you can still enjoy at home.
Till clicks!
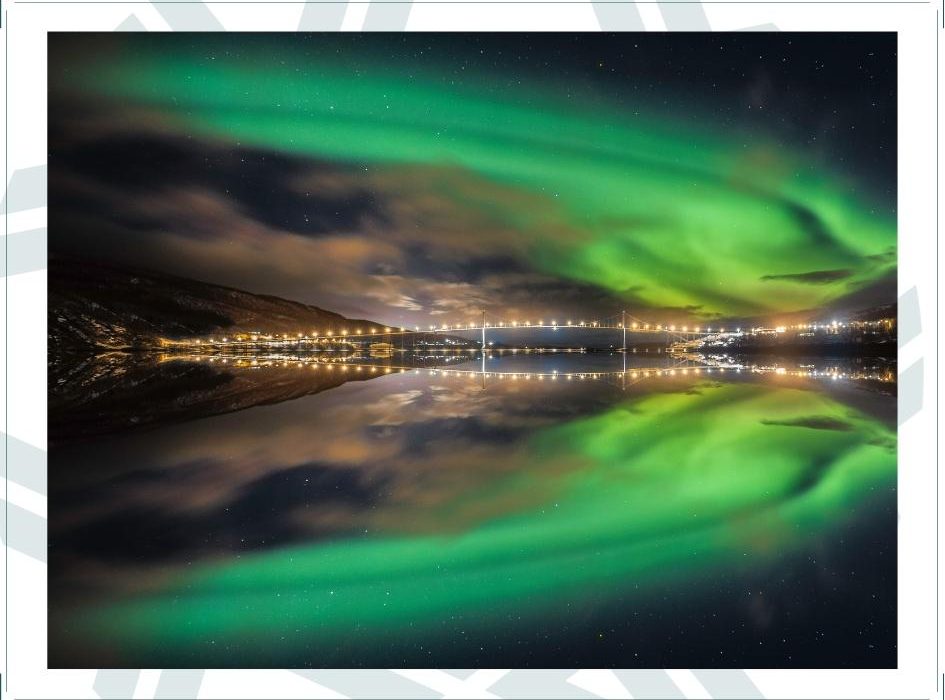
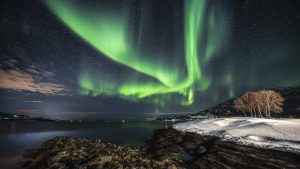 The Northern Lights are one of the most beautiful and magical natural phenomena out there. And for many photographers a dream to capture. That's why we tell you the best way to do that, and what you can pay attention to to take the perfect photo.
How do the Northern Lights actually form? This is due to electrically charged particles from the sun entering the earth through the atmosphere. These protons and electrons from the sun are thrown into space during a solar storm or explosion. Because the particles come into contact with the terrestrial gases, the northern lights appear in all kinds of colors and shapes. You are most likely to see this phenomenon in northern countries near the poles.
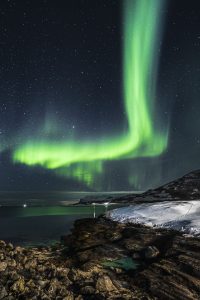
– The darker the better. For this it is best to photograph in the winter with the new moon. You also don't want any light pollution behind the northern lights, so the intensity decreases.
– Take the photo as far north as possible and towards the north. You have the best chance of seeing the northern lights well without disturbing elements in the background.
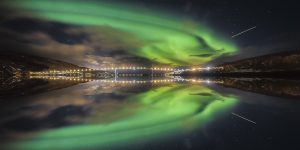
– Choose a good location with a landscape or water in the foreground. That way you get more depth in the photo or a nice reflection in the water.
– Good preparation is half the battle. Being a natural phenomenon, it remains unique and unpredictable. It is therefore never exactly the same twice. Make sure you are at your location on time, because the Northern Lights can also be gone in no time.
– The Northern Lights always move from east to west. Since the light is quite active at times and moves quickly through the air, a faster shutter speed is better when capturing. If not, a slower shutter speed is recommended.

For a good preparation, there are also a number of apps that can come in handy. First of all, an app that displays the KP index, in other words the activity of the northern lights due to the sun explosions in space. That way you know where it can be seen and to what extent.
If you want to make sure that there is no light pollution in the area, an app like Light Pollution Map is very useful. This map shows where there is the most light pollution, something you want as little as possible when photographing the northern lights. In addition, a weather app is always useful to see if it will be very cloudy, because clouds make the northern lights less bright.
Would you like to photograph the Northern Lights? You are most welcome on our photo tour!
Please take a look at our photography trip Lofoten and our photo tour Senja
Want to learn photography or brush up on your own photography skills?
Sign up for one of the many workshops!
Till clicks!

Let's keep it simple. There are now so many lenses on the market that you sometimes can't see the forest for the trees. No worries! I explain clearly and clearly what you can pay attention to. This way you go out with the right lens in your bag. Which choice do you ultimately make? That is entirely up to your preference. You can divide a lens into two categories:
With zoom lenses you can of course zoom in and out, with prime lenses you can't. The advantage of a zoom lens is that you have a wide range. You can determine your composition comfortably from one place, by zooming in and out. A disadvantage is that the quality is somewhat less than with a prime lens. If you have a bright zoom lens, with a fixed aperture over the entire range, then the difference is not too bad. An example of this is a 70-200mm F2.8.
Prime lens forces you to use your legs to determine your composition. In order to learn to photograph, you are therefore forced to look at your composition differently. Consider this an advantage, your creativity is addressed. Another advantage of a prime lens is that it is often brighter and therefore also more qualitative. An example of this is a 60mm F2.8 or a 100mm F2.8 macro.

Let's look at the variants. You have:
A macro lens is required for photographing details. This allows you to get the subject close and, depending on the magnification factor, display it enlarged. It is not for nothing that these types of lenses are so popular in macro photography.
You can also capture excellent detail with a telephoto lens. You can bring the subject closer and show more detail. Ideal for macro photography is a range from 200mm. Keep in mind that with a telephoto lens you have to observe the minimum focusing distance. Often you need to have at least 1 meter distance between you and your subject.
Other lenses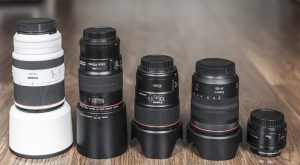
Even with a wide-angle lens, you can get started with macro photography. Because you can often get very close to your subject with a wide-angle lens, you get very interesting perspectives. Try it out, you will be amazed at the result.
An extension cube can be a godsend if you do not want or cannot invest in a macro lens. By means of an extension cube (placed between your lens and the camera), the minimum focusing distance to your subject is reduced. So you can get closer to your subject, allowing you to view it larger. An extension cube is only a hollow intermediate ring and is attractive in terms of price. In combination with (for example) bright portrait lenses, you get a surprisingly good result.
Sign up for one of the many workshops!
Till clicks!

![]()


Recente reacties