Travelmarks-photography... More than photography trips!

More than photography trips

Contact here
Posts by

Mark Brands

News

Customer Stories #5 Workshop C-mine

Customer Stories #5 Workshop C-mine

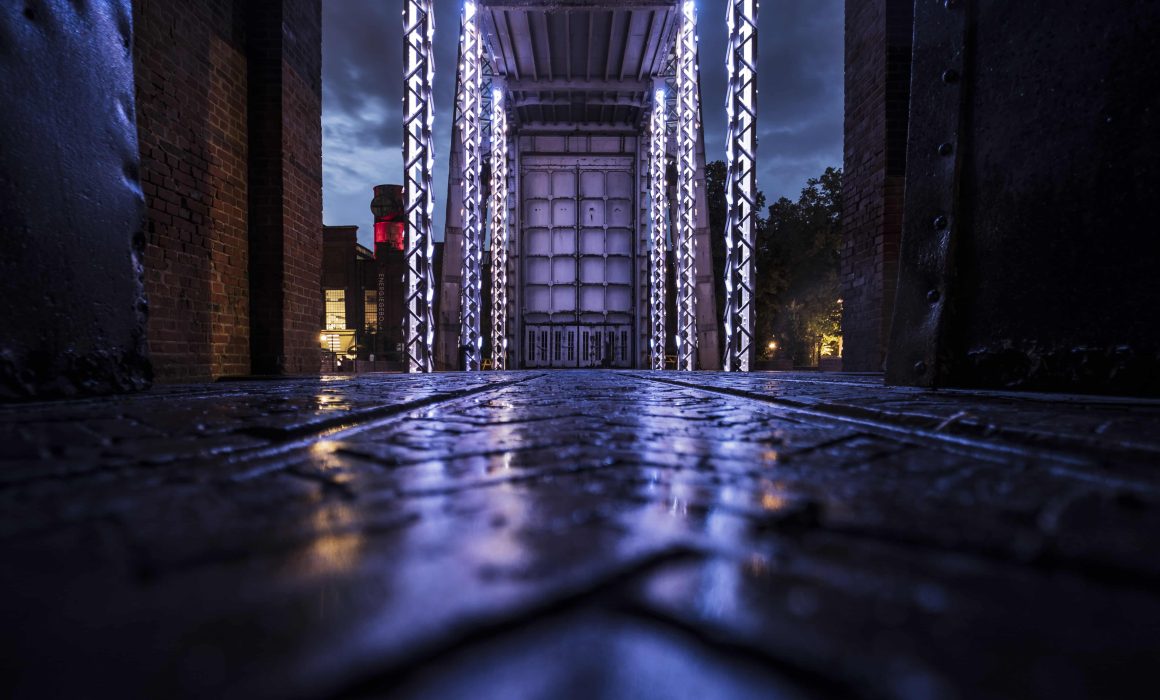
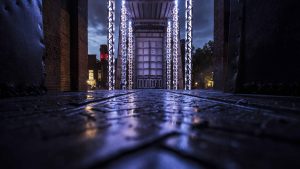
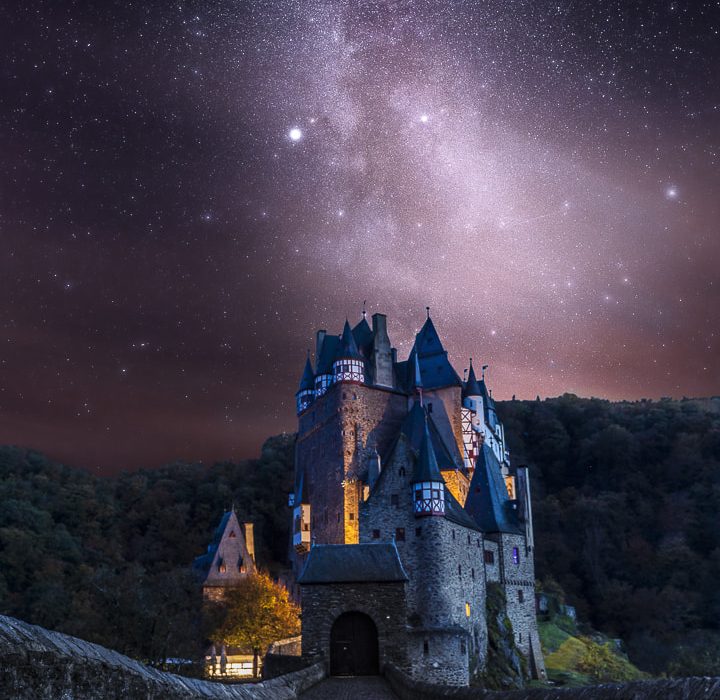
Just across the border in Belgium you will find the C-mine, a beautiful mine perfect for industrial photography. Recently another workshop took place at this unique location. The day was optimally used, both outside and inside the mines were photographed during the blue hour and some spectacular lightpaint demonstrations were given. In these customer stories, Natascha tells about her experience of the workshop.

Participant Natascha about her experience

The workshop C-mine in Genk, Belgium is the first workshop of Travelmarks-Photography in which Natascha has participated. In addition to her work, she has her own photo studio at home where she also regularly photographs. In her field of work as a photographer, she describes herself as very broad because she finds many types of photography interesting and fun to capture, such as fine art, urbex and portraits. In the future, she hopes to turn her passion into her full-time job.

Why did you choose to participate in this workshop?

A friend of mine had selected the workshop, so I went along. The location of the workshop is also a bit urbex-like, so I thought it would be fun to shoot there.

What did you do during the workshop?

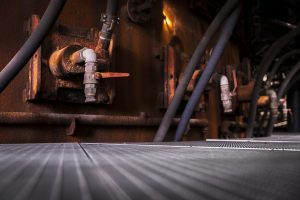
We were on location around 11 am until about 8 pm. We have photographed both inside and outside. Even in the evening when it got dark. During the workshop we learned a lot about camera settings, which angles are good to shoot from and how you can create reflections with water. We were also able to take pictures of Mark's lightpaint demonstrations. In doing so, we learned to use the correct camera settings. The C-mine is a great terrain, both the mines and the tunnels were very cool. The stories about the mines and the history behind them were also very impressive. And we were very lucky with the weather. The crowds were also not too bad, which made it easy for us to take pictures. Finally, we all had dinner together to end the day.

Was it as you expected?

I have done workshops before and of course everyone does it differently. But I am very satisfied with the C-mine workshop. There was a nice and relaxed atmosphere. Good instructions were given by Mark and I was able to take a lot of pictures that day. In the whatsapp group with all participants, some have shared their photos. It's nice to see how everyone has their own way of post-processing. Even if everyone took the same photo, the end result can be very different.

How did you find the guidance and would you recommend the workshop to others?

Totally great. Mark was very friendly and open, and you could never ask too many questions. There was enough time for questions and guidance. So a very nice person to follow a workshop with. You notice that he is knowledgeable, takes his time and is calm. But there was definitely a bit of humor too, so highly recommended. I am also certainly open to participating in a photography workshop or trip again.


Want to learn to photograph or gain experience?

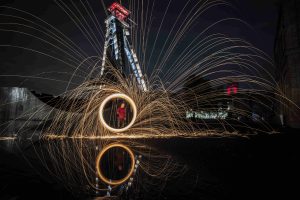
Just as excited to participate in one of many workshops? Or even a multi day photography trip? Then take a look for more information and sign up!


Till clicks!

News

Tips for industrial photography

Industrial photography

Photography has many niches, one of which is industrial photography. You take photos at locations such as companies, factories and industrial sites. It is a somewhat rougher form of photography and can sometimes be compared to urbex photography, because some locations seem quite remote and deserted. In this article we give you a number of tips that you can take into account for industrial photography. The inspiration for this news item and the photos come from the C-mine in Genk, Belgium.


Tips for industrial photography

  • Take a whole day off when you go out. By being on location early, you have enough time to explore the area and prepare for the blue hour. Because the blue hour only lasts about 45 minutes, it is important to have all equipment prepared so that as little photography time as possible is lost.
  • Shoot in the evening, preferably after a rainy day with clouds. These conditions fit very well with the atmosphere of industrial photography. The clouds make the sky more dramatic and the fallen rain creates beautiful reflections in the water. Check in advance what the weather will be that day.
  • Another aspect of industrial photography is safety on location. If it is an abandoned location, with no barriers and lots of artifacts/machinery left behind, be careful where you walk and shoot. Often it is entered at your own risk. Everything at the C-mine in Genk is freely accessible and open to the public.
  • Light is of course very important in photography, but with industrial photography (especially at night) there is a chance that there is not much light left. So take a tripod with you for working with slow shutter speeds and use a flash if necessary.
  • When you want to focus on a certain point/object, use a larger aperture (F11-F16). A larger aperture provides a lot of depth of field. Of the total depth of field, 1/3 is in front of the focus point and 2/3 behind it, taking into account the determination of the focus point.
  • If you choose to photograph a certain item sharply, use the interplay of lines around it. Like the photo below, where the lines of the grids point to the subject. That way your eyes will naturally be drawn to the subject.
  • In addition to the interplay of lines, you can also play with different angles, angles from which you would normally not photograph so quickly, often resulting in surprising and unique images. In addition to trying out a different angle, you can also focus on the details. Like different structures or specific objects, making it almost macro photography. At a location like the C-mine you have endless options in which you can express your creativity.
  • Another creative way is to use steel wool for light painting. A good combination with the atmosphere and industrial location. Also take into account the safety of others and the environment. The sparks flying around can be dangerous.


Want to learn to photograph or gain experience?

Would you like to try out industrial photography yourself? Then take a look at the many workshops. During the workshops you can gain experience at your own pace, under the guidance of a professional photographer. Because the workshops are in small groups, there is enough time and attention for each student. Would you like to participate? Then sign up right away!

Till clicks!

News

Customer Stories #4 Photography trip Luxembourg

Historic and green Luxembourg

The 4-day photography trip to Luxembourg has recently taken place again. A trip close to home but it still has a lot to offer. Including the old city center where remnants of the fortress walls can still be seen. The city center even belongs to the UNESCO World Heritage List. But there is also plenty to visit outside the city. Luxembourg city is surrounded by beautiful nature, full of hiking trails and castles. Which makes it an ideal destination for photography.

Do you want to know more about the diversity of Luxembourg? Then take a look at our other newsitem.


Photography tour in versatile Luxembourg

Last October, Travelmarks and a group of students spent a few days in the versatile and green Luxembourg. Including student Arijan van Alphen, who has had a passion for nature and sports photography for a long time. It was the first time for him to participate in a photography trip and workshop. In this news item, Arijan tells about his experience of the photography trip to Luxembourg.

Why did you choose to join the Luxembourg trip?

I had been looking for a photography workshop for some time to improve my photography skills, but many workshops are often only half a day and a large group. The advantage of the trip to Luxembourg was the small group and the pricing. When I came across this photo tour on Facebook, it caught my eye. The promise of a small group of students with an appealing, versatile program appealed to me, which is why I decided to sign up.

What did you do during the 4-day trip?

I've tried many things to take different types of photos, for example playing with depth of field. The waterfalls at Schiessentümpel and Kallektuffquell that we visited were nice, because I prefer to have something of water in nature photography. The evening/night photography in Esch-sur-Sûre and Vianden were another branch of photography for me that also gave me inspiration. We couldn't have been more fortunate in terms of weather conditions.

The photos below were taken by Arijan during the photo tour.


How was the guidance and do you have any tips for the next workshop?

As expected actually, excellent guidance before and during the trip. In addition to the planned activities, there was also room for improvisation, which we eagerly used as a group. During the trip, Mark had the necessary tips and tricks for every student at his/her level and, not to forget, sufficient attention, not only in terms of photography, but also for the person. The time schedule was determined so that everyone on location could go wild with photography. In a few weeks we will meet again with the group to share our photos, among other things.

A tip for a next photography tour or workshop would be a general explanation upon arrival at a location, before everyone starts shooting. For example, by sharing some tips and explanations about the correct camera settings, so that we can get started right away.

Would you recommend this trip to others?

It is definitely recommended for others. It is freely accessible and short. In addition, it is suitable for all levels. I will even participate in another photography workshop at Travelmarks soon.


Want to learn to photograph or gain experience?

Would you also like to participate in a photography tour or workshop yourself? Then take a look at the many workshops or at the multi-day photo trips and tours, and sign up!


Till clicks!

News

Capturing other cultures

Tips for capturing other cultures

For those who take the camera with them on a trip, they have to deal with someone else's culture and the associated norms and values. With cultural photography you will therefore notice that a lot can be achieved with mutual respect. To help you on your way to achieving this, we'll give you a number of tips and examples.

Immerse yourself in other people's culture

Preparation is essential on any trip. And by that, we don't mean looking up nice sights or holidays, but delving into the culture and faith there, such as their norms and values, but also their customs. For example, when photographing the Masai, it is customary to dance and sing to someone to thank them. This may seem a bit uncomfortable at first glance, but it is actually a form of gratitude. There are also some cultures that believe that a piece of their soul is taken from them the moment they are photographed. Then it is often wise to ask permission in advance. Such handy do's and don'ts can already be found online, so make sure to use them.

Cultural photography tips

Cultural photography is mainly about the interactions between the photographer and the subject. Earning the respect is therefore more important than the result. That is also the added value of this type of photography, where you mainly make personal images. Often people have a certain pride at the moment you show them their photo, something that is not at all self-evident for many in certain places. These kind of beautiful moments that you share with each other often make the best memories. We are therefore happy to give you a number of tips if you want to get started yourself;

  • Be respectful. You are, as it were, a guest, so don't be too pushy and don't cross other people's boundaries. Not everyone appreciates when pictures are taken of them, better luck next time.
  • Ask permission from the person you want to photograph. If you don't speak the language and there is no interpreter, it comes down to using your hands. Make contact with the person and point to your camera, often with a small gesture they let you know whether or not they want it.
  • Always go to the people with the pictures taken. Not only is it nice to show them and thank them, but this is also how you make contact and who knows, there may be a very nice story behind that person. As a thank you, a little extra such as money or food is often much appreciated.
  • What if you took photos without permission, for a spontaneous moment, but they don't want that? Then it is best to delete all photos on the spot and leave it at that. This can, for example, occur with the people who, as mentioned earlier, believe that a piece of their soul is being taken away.
  • Cultural photography often consists of portraits. Focus on the eyes and make sure you capture that person in their own unique way as beautifully as possible. The emotion in their faces makes the picture, which is why it's so important that the eyes are sharp. To ensure that there is a nice contrast, the challenge is to look for a calm background in the chaos. That way the subject comes into its own.
  • Storytelling is something that a good photo meets. With street photography, for example, there is something to say about everything, it is often an intimate insight into someone's daily life. For example, in the photos below. This woman had not yet realized that photos were being taken, so you can see her counting her last money with all her belongings on the street. Such a series of photos can tell so much without any prior knowledge, and that is precisely the art of storytelling.


Want to learn to photograph or gain experience?

Would you like to learn more about photography and your camera yourself? Or gain more experience during one of our photography trips? All Travelmarks workshops and trips are in small groups and accompanied by a professional photographer. For more information, take a look at the many workshops and photo trips and sign up.


Till clicks!

News

Customer Stories #3 photographing the Milky Way

Photographing the stars

Photographing the starry sky is also known as astrophotography. For example photographing stars and planets when it is dark. It is a certain niche within the photography world that requires a lot of time and precision. In this news item, customer Tom tells about his experience of the astrophotography workshop and we will give you a number of tips to get started with capturing the starry sky.


Workshop Astrophotography Burg Eltz

Hobby photographer Tom recently took part in the astrophotography workshop at Travelmarks. This workshop took place at Eltz Castle in Germany. A photogenic location with beautiful natural surroundings. For this news item we asked him to share his experience with us.

Why did you choose to participate in this workshop?

I am interested in astrophotography and capturing it. Normally, I mainly photograph nature and landscape, but I prefer to be all-round. When I came across this workshop, I signed up to learn more about the startracker, which is needed when photographing the starry sky. This was also my first time doing a workshop like this.

What did you do during the workshop?

In the morning we took pictures at the river, It was still foggy and you could see another castle in the distance at the top of the mountain, which makes for a nice picture. During our visit we also went inside, where they walked around in traditional costumes. There was even a blacksmith at work and a singer, making it quite an experience. In the evening after dinner, we photographed the Milky Way at Burg Eltz until it was no longer visible. We used a startracker for this. That was very interesting and I learned a lot about it.

Was it as you expected?

More or less, we managed to photograph the Milky Way. We were dependent on the weather, because we already had to reschedule the workshop twice due to the weather conditions. But it was certainly a successful workshop and worth repeating. Perhaps in a different environment.

Are you satisfied with the results?

Yes, the result has become beautiful, but the photos still need to be edited. A few weeks later, we had also sat down with the group and Mark to share each other's work. There were plenty nice photos and everyone was very satisfied.

How was the guidance and do you have any tips for the next workshop?

The guidance was good, we also got a lot of time to get started ourselves. I also received some positive feedback. And the other students were actually just as enthusiastic. For a next time, an overnight stay could be added, so that there is even more time for astrophotography. The first evening we became acquainted with the startracker and the next evening we could start shooting. It would have been nice to have had more time for that.

Would you recommend this workshop for others?

In case you are interested, or if you want to delve further into it, then yes. There was good guidance so it is also doable for beginners. You do need some knowledge about the device. The starttracker is not yet known to many, but that was also explained.

What was the highlight for you?

It would be the evening at the castle / fortress Eltz for me, with photographing the Milky Way and the beautiful green surroundings there.

Getting started photographing the Milky Way yourself

Want to get started yourself? Then we are happy to give you some tips to help you on your way!

  • Timing is very important in astrophotography. You want to be in the right location at the right time to use as much time as possible. So be well prepared and be at your location on time so that you can start right away with the right settings as soon as the conditions are at its best.
  • The right weather conditions also play a major role in this. As mentioned earlier, the planning was changed twice because the weather conditions were not optimal. The best time to photograph the Milky Way is during new moon, on a clear, cloudless night. With as little light pollution as possible and oriented to the south. In the winter, the starry sky is not sufficiently visible, so it is best to go in the summer months.
  • Using a startracker, which you place between your tripod and camera, you focus on a fixed point (the pole star) in the universe so that the camera moves with the earth. That way the stars remain visible and sharp in the photo. Using a starter tracker, your shutter speed can be up to a few minutes. A formula that helps determine shutter speed is as follows; 400/focal length = shutter speed in seconds.
  • To capture both the starry sky and the subject in the foreground sharply, you can take two photos. For example at Eltz Castle, a photo was taken of the castle during the blue hour. When the Milky Way is best visible, it will be focused on for a second photo. During post-processing, both images are merged so that both the castle and the starry sky are clearly visible.


Want to learn to photograph or gain experience?

Would you like to learn more about (astro)photography and your camera yourself? Or gain more experience in the outdoors with guidance? Then take a look at the many workshops and sign up.


Till clicks!

News

Shooting in the winter

Shooting in the winter

The winter period is a great season to photograph. Now that winter time is approaching, we have listed a number of tips. So that you are well prepared and can shoot such beautiful winter pictures yourself.

The blue and golden hour

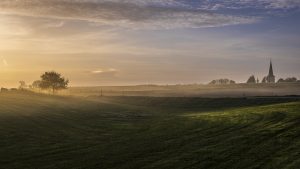
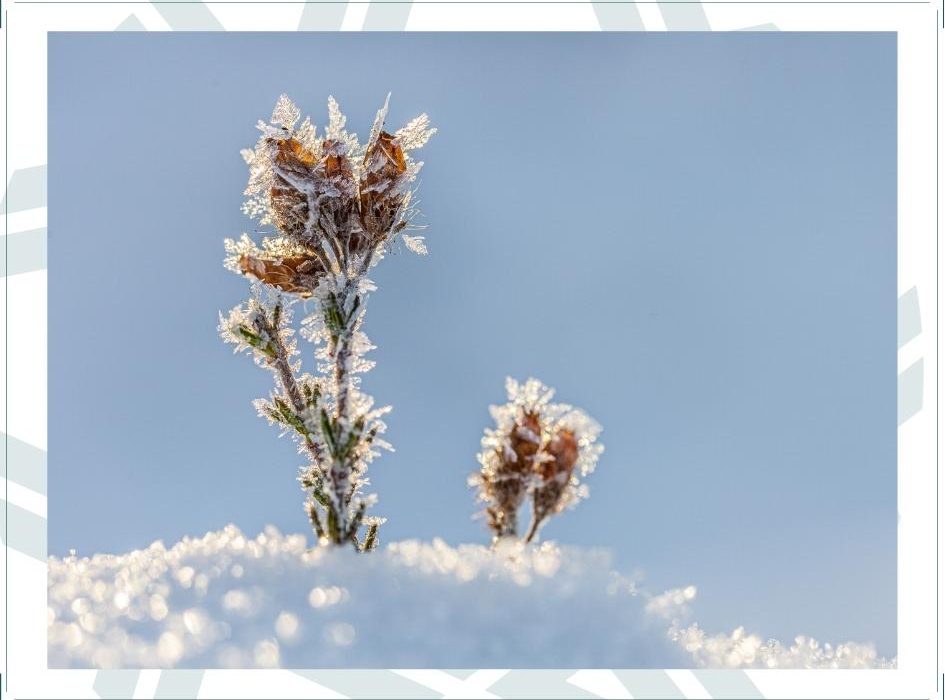
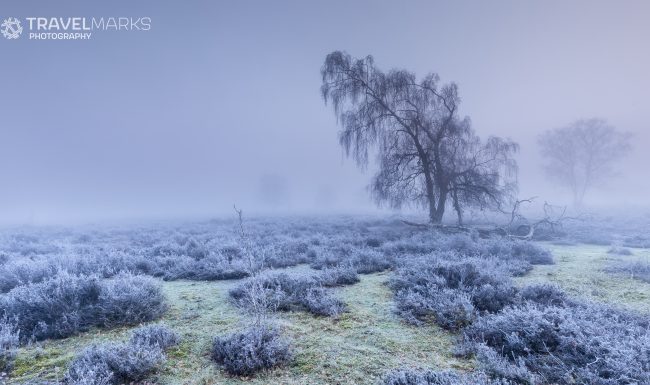
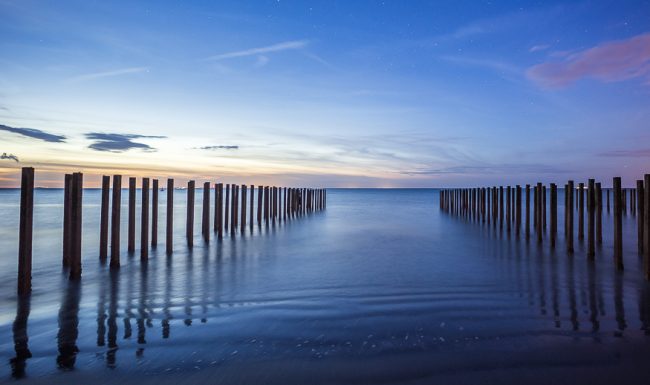
When photographing a winter landscape, good planning is very important. The best time for this is in the morning, around sunrise. Fortunately, the sun rises a little later in winter, so you don't have to get out of bed too early. It is important to be on location on time so that you can prepare everything properly and make optimal use of the so-called blue and golden hour. The blue hour is just before the golden hour in the morning, in the evening it is just the other way around. During the blue hour, the sky begins to take on more color as it transitions from night to day. At the beginning of that hour, at 'civil twilight', there is often still some fog, which even creates a fairytale atmosphere. The golden hour begins shortly after the blue hour.

If you want to capture the many ice crystals, you have to be there in time. They are best visible at sunrise, when it has frozen at night. It is coldest when the sun rises. Soon after, everything is slowly warmed up by the sun, and the ice crystals will disappear.


Choosing the composition

In addition to the right timing, choosing the location and composition is also important. It's good to know exactly where the sun rises and how you want to take your picture. During the sunrise you can shoot towards the sun for a colorful sky. When the sun is a bit higher, you can change position and photograph with the sun at your back. That way you get the soft and warm glow of the light in the photo.


Shoot with the right settings

Now that you know where and when to shoot, it's time for how to do it. For landscape photography, a large depth of field is recommended. That is, for example, an aperture between F11 and F16. For lovers of nature and macro photography, a low aperture is used. This is between F2.8 and F5.6, so you get your subject sharp and the background a bit blurry, so that more depth is created.


Want to learn to photograph or gain experience?

Would you like to learn more about photography and your camera yourself? Or gain more experience in the outdoors with guidance? Then take a look at the many workshops and sign up.

Till clicks!

News

All about the Côte d’Opale

The Opal Coast

The Côte d'Opale, or the Opal Coast, is a coastal strip in the north of France. For many an ideal holiday destination and perfect for a road trip because it has so much beauty to offer. In this news item we tell you more about what exactly it has to offer and how the name Opal Coast actually came about.

Picturesque fishing villages and rugged coastlines

The coast stretches from Calais to Berck-sur-Mer and is 120 kilometers long, full of numerous picturesque fishing villages and sandy beaches. The coastline also consists of large areas of chalk cliffs. These are high, steep limestone rocks formed by the sea and wind. You will also find extensive green fields with dune grass and colorful flowers.

The name Opal Coast was first mentioned by the writer and painter Édouard Lévêque in 1911. He made the comparison between the opal and the coast. The gemstone can change in all kinds of colors, which would correspond to the landscape consisting of the blue water, light-colored beach and the white chalk cliffs.


A piece of history and Battery Todt

Along the coast you will also find some historic buildings and monuments from the first and second world wars. Because the mainland near Calais is so close to England, it played a major role during the wars. Therefore, during the Second World War, some bunkers along the coast were built by the Germans. For example, that of Battery Todt, near the village of Audinghen. Because the location was so favorable, the shells could even reach England. The battery is now a museum and can therefore be visited up close.


Street-Art murals Boulogne-sur-Mer
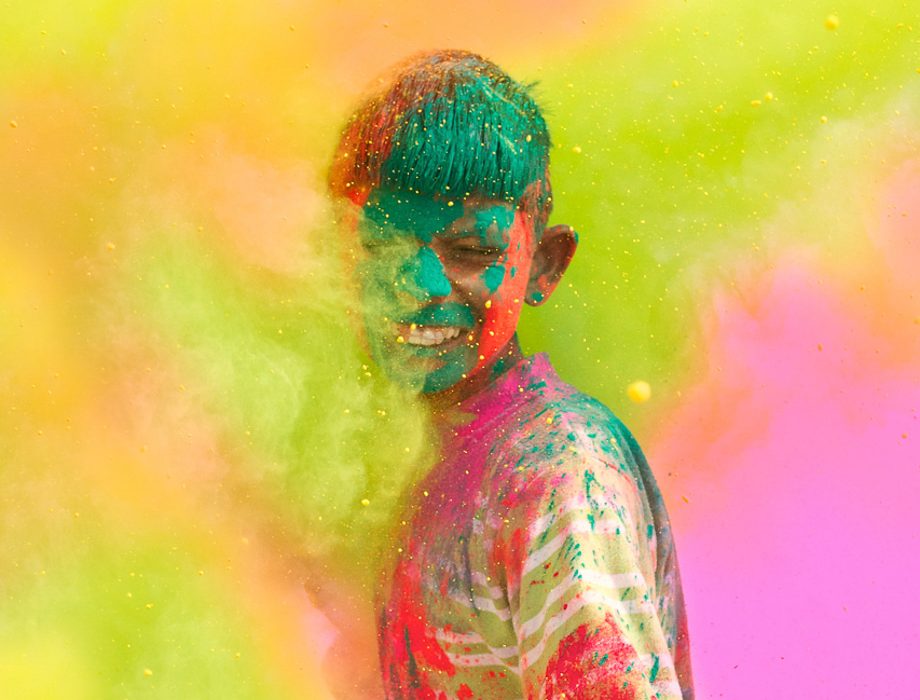
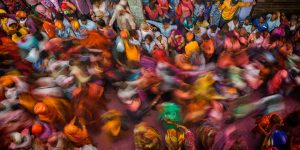
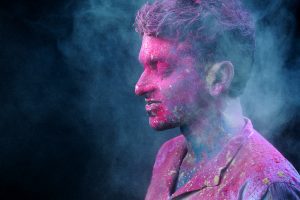
In addition to recreation, the Opal Coast is also ideal for photographing. Because the landscape is so diverse, you can come home with a lot of creative pictures. Not only the nature is interesting to capture, but also the artistic side of the Opal Coast should not be forgotten. Boulogne-sur-Mer is the street art capital of Northern France. You will find several colorful murals scattered throughout the village. With the street art walk you walk past all the works of art, as if it were an open-air museum. Because it is so popular, there is now an annual festival where street artists can enjoy themselves again and expand the collection.


Photography tour Opal Coast

Would you like to visit the Opal Coast yourself and learn to take beautiful pictures? Then the 5-day photography trip to the Côte d’Opale may be something for you!

During this photography trip we will start shooting with a long shutter speed, we will use the beautiful sunrises and sunsets, you will learn to capture the street art paintings beautifully and we will visit the hidden gems along the coast. Also not to be missed are the two impressive capes Cap Blanc-Nez and Cap Griz-Nez. We also travel in small groups, so you can expect a lot of personal guidance.

Let’s click!

News

Photographing mushrooms

Photographing mushrooms

It's that time of year again when mushrooms shoot out of the ground en masse. There are thousands of species to be found in the Netherlands. So a good reason to go out and capture them. To help you on your way, we will give you a few tips for taking a beautiful and creative photo.


The season of the mushrooms

Summer is over and it's raining more and more. Ideal for the mushrooms, because they appear fairly quickly after a wet period. Those who want to shoot a typical autumn picture in the forest can of course not forget the mushrooms. It is almost a challenge to look for the most beautiful and unique mushrooms, because they often hide among the grass or grow on the trees.


Macro photography

Mushrooms are perfect for macro photography. Each mushroom has its own structure, color or shape and those details can be captured very well with a macro lens. Not only the top of the mushroom, but also the gills underneath the cap make for very nice pictures. When taking such detailed photos, also take into account disturbing elements, such as sand, twigs and damage to the mushroom.


Photography Tips

  • With 'photo stacking' you photograph the same composition several times, each time with a different focal point. When editing, these photos are merged together, creating a new image. This gives the photo depth without losing brightness or sharpness.


  • For those who want to display mushrooms a little more creatively, the 'twist-zoom' is an option. It's an example of 'intentional camera movement' (ICM), where you zoom while the shutter is still open. This creates an image with a spiral movement.


  • Light is a very important element when taking pictures. With the help of a flashlight you can play with the incidence of light, so that you can determine the atmosphere of the photo. Think light from above, through the cap of the mushroom. Or from below, so that the mushroom seems to give light. You could also use backlighting to make the silhouette clearly visible. By holding an autumn-colored leaf in front of the flashlight, you get a softer and warmer light.


  • By using lens filters you can play with the atmosphere in the photo. For example, it can give a warmer or colder glow, but also give a certain color to the photo. Do you want to know more about the use of filters? Read our photography tips about photographing with filters.


  • Another element you can play with is water, such as morning dew. But if that is not available, you can also create the droplets yourself with a plant sprayer. In addition, you can give the effect as if it is raining by spraying water from above while taking a photo. Drops of water can also give a bokeh effect. This is often blurred in the foreground or background, making the subject stand out even more clearly. With a large aperture you take photos with a shallow depth of field, so in this case the mushroom is displayed sharply and the background is not focused.

Learning photography

Want to learn more about macro photography? Take a look at our workshops and sign up!

During the workshops you will put what you have learned into practice in small groups. There is guidance where necessary and enough time and space for taking pictures, which you can still enjoy at home.

Till clicks!

News

Holi Color in India

Holi Color in India

The world famous Holi Color festival in India is known for its colorful and traditional festivities during the New Year of the Hindus. In this news item we tell you more about the meaning behind Holi Color and how you as a photographer can best capture this event.

Holika Dahan

Holika Dahan is celebrated the day before the colorful festival, but actually starts 40 days in advance. Then a cutting of a miracle tree is planted, called Holika. A pyre is made around it that grows bigger every day. During Holika Dahan, this pile is set on fire, symbolizing the burning of the Holika. However, the name comes from an old folk tale in India, in which the evil Holika (sister of King Hirankashyapu) went up in fire and Prahlaad, the king's son survived the same pyre.

Holi-Phagwa

The Holi-Phagwa is another name for the Holi Color festival. This festival celebrates the New Year and the victory of good over evil. Since it takes place every year in March, it is also a big spring festival. This day everyone takes to the streets and the scented water and colored powder flies non-stop through the air. The color powders come in all kinds of different colors, each with its own meaning. For example, yellow stands for success, pink for love and harmony and blue for healing and protection.

Shooting during Holi Color

Of course, this exuberant and colorful festival is beautiful to capture, but it is also a challenge for the photographer and the camera itself. It is therefore important to pack your camera equipment (and lens) well so that it is protected against the crowds, but of course also against all the colored powder and water that is thrown.

Do you want a nice atmosphere of the festival? Then photographing from a higher point with a view of the busy streets and squares is a good idea. Portraits also give great results, especially if you manage to capture the emotion in the photo. And finally, be well prepared so you know the best photo locations. Locals can help you with that.

Photography Tour Rajasthan North – India

During the photography trip we travel through Rajasthan, a state in North India. The Holi Color Festival is also celebrated here on a grand scale and is therefore not to be missed during the tour. Prepare yourself for an unforgettable experience and a colorful experience on this photography tour.

News

How do you photograph the Northern Lights?

How do you photograph the Northern Lights?

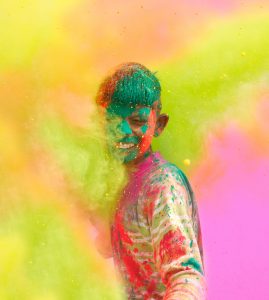
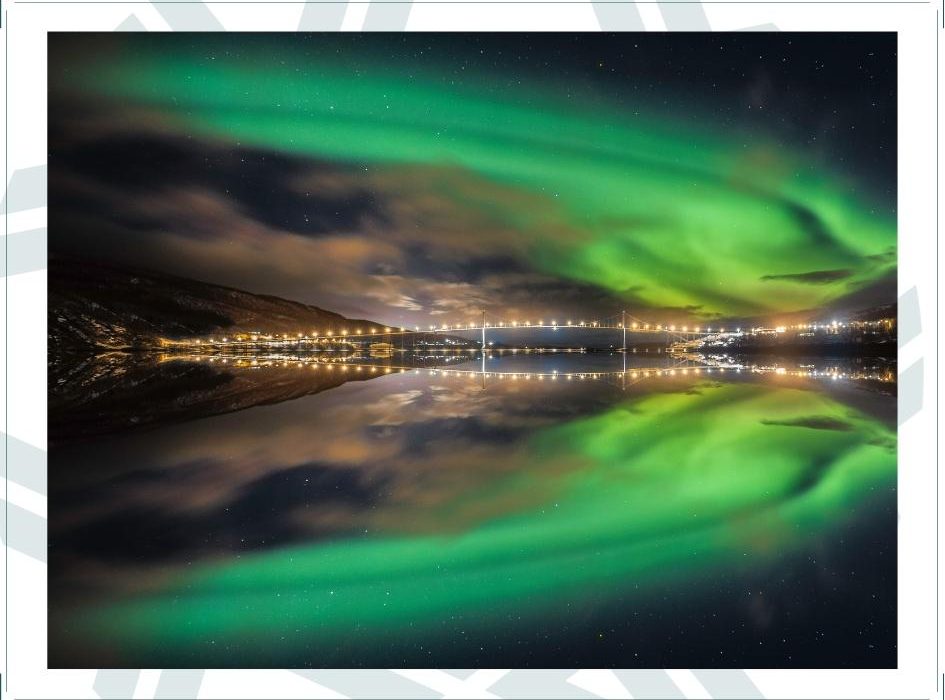
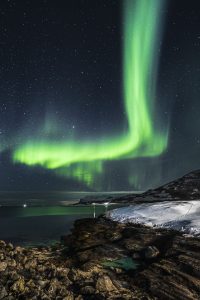
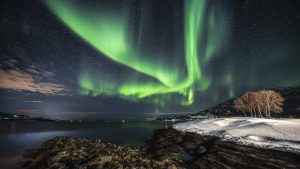
The Northern Lights are one of the most beautiful and magical natural phenomena out there. And for many photographers a dream to capture. That's why we tell you the best way to do that, and what you can pay attention to to take the perfect photo.
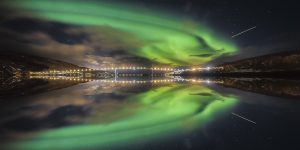
The Northern Lights

How do the Northern Lights actually form? This is due to electrically charged particles from the sun entering the earth through the atmosphere. These protons and electrons from the sun are thrown into space during a solar storm or explosion. Because the particles come into contact with the terrestrial gases, the northern lights appear in all kinds of colors and shapes. You are most likely to see this phenomenon in northern countries near the poles.

Tips for capturing the Northern Lights


– The darker the better. For this it is best to photograph in the winter with the new moon. You also don't want any light pollution behind the northern lights, so the intensity decreases.

– Take the photo as far north as possible and towards the north. You have the best chance of seeing the northern lights well without disturbing elements in the background.

– Choose a good location with a landscape or water in the foreground. That way you get more depth in the photo or a nice reflection in the water.

– Good preparation is half the battle. Being a natural phenomenon, it remains unique and unpredictable. It is therefore never exactly the same twice. Make sure you are at your location on time, because the Northern Lights can also be gone in no time.

– The Northern Lights always move from east to west. Since the light is quite active at times and moves quickly through the air, a faster shutter speed is better when capturing. If not, a slower shutter speed is recommended.

Good to know

For a good preparation, there are also a number of apps that can come in handy. First of all, an app that displays the KP index, in other words the activity of the northern lights due to the sun explosions in space. That way you know where it can be seen and to what extent.

If you want to make sure that there is no light pollution in the area, an app like Light Pollution Map is very useful. This map shows where there is the most light pollution, something you want as little as possible when photographing the northern lights. In addition, a weather app is always useful to see if it will be very cloudy, because clouds make the northern lights less bright.

Photography Trip Northern Lights Lofoten & Senja

Would you like to photograph the Northern Lights? You are most welcome on our photo tour!

Please take a look at our photography trip Lofoten and our photo tour Senja

Want to learn photography or brush up on your own photography skills?

Sign up for one of the many workshops!

Till clicks!

1 2 3 4 5